REVIEW · SACRED VALLEY
Inca Trail Machu Picchu 4 Days
Book on Viator →Operated by Dreamy Tours · Bookable on Viator
Altitude, sunrise, and teamwork start here. This Inca Trail to Machu Picchu run out of the Sacred Valley pairs early-morning logistics with real trail time, then lands you at Machu Picchu before the crowds settle. I love how guide Franklin keeps the group together while still letting people peek at side ruins, and I really loved the trail food—one night even included a baked cake—because it makes long days feel doable. The trade-off is simple: you need strong fitness for the cold, steep parts (including Death Pass), plus you’ll want your own sleeping bag since it’s not included.
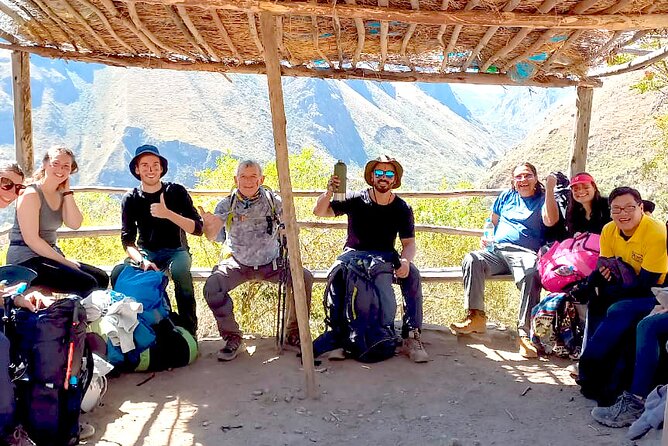
What also impressed me is the behind-the-scenes support that makes this route feel organized instead of chaotic. You’re in a small group (up to 10), and you’re not hauling gear—tents, cooking setup, and extra hands are handled for you—so you can focus on breathing, walking, and watching the views change hour by hour. Still, the schedule moves; if you’re the type who hates tight timing, the day-4 train and bus connections can feel like a sprint.
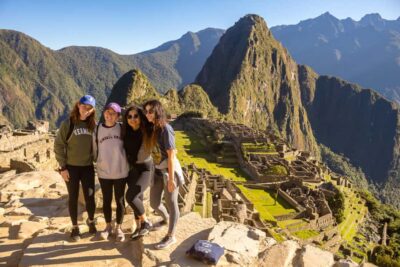
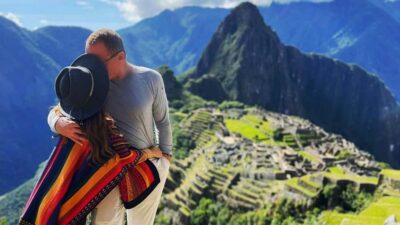
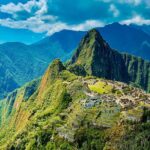
On the last morning, you hike up to Inti Punku (La Puerta del Sol) for a first look at Machu Picchu, then you get a guided visit of about two hours with enough free time after to wander at your own speed. If you want big panoramas, the plan even gives you time to climb Huayna Picchu, assuming you can get entry on your visit day.
In This Review
- Key things that make this 4-day Inca Trail work
- Cusco to Km 82: why the day starts so early
- Ollantaytambo stop and your first taste of the Sacred Valley
- Day 1 to Wayllabamba: Llactapata context and a manageable first climb
- Practical note
- Day 2 to Chaquicocha: Warmihuañusca (Death Pass) is the headline
- How the tour handles pacing
- Day 3: Wiñayhuayna rainforest, tunnels, and Phuyupatamarca above the clouds
- Why this day matters
- Day 4: Inti Punku sunrise view and a guided Machu Picchu visit
- One logistics reality check
- Price and value: what $905 covers (and what you must bring)
- Guides, food, and the human side of the trek
- Camp setup: comfortable enough, but don’t fake preparedness
- Who this Inca Trail fits best
- Tips to make your trip easier (based on how the days are set up)
- Should you book this Inca Trail to Machu Picchu?
- FAQ
- How long is the Inca Trail portion on this 4-day tour?
- Where does the tour start?
- What’s the highest point on the trek?
- What’s included for camping?
- Do I need a sleeping bag?
- What meals are included?
- Is Machu Picchu entrance included?
- What language is the guide?
- How does the trip get back to Cusco?
Key things that make this 4-day Inca Trail work
- Small group size (max 10) keeps the pace human and the logistics manageable
- Guide support in Portuguese or Spanish (on request) helps you understand what you’re seeing
- Camp setup is included, including tents, mats, dining area, and portable toilet gear
- Food quality is a highlight, with multiple meals plus nightly tea time mentioned in real experiences
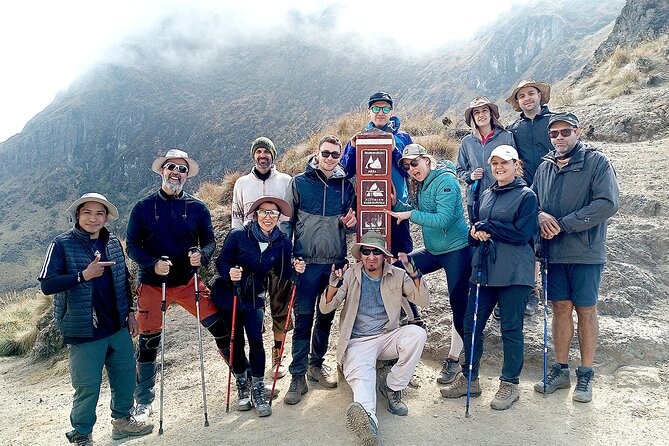
- Altitude is part of the deal, including Warmihuañusca (Death Pass) at 4,200m
- Machu Picchu is timed right: Inti Punku first view, then a guided visit around 8:00 am
Cusco to Km 82: why the day starts so early
This tour begins with a very early pick-up in Cusco at 5:30 am, aimed at getting you to the start point in time and keeping the day running smoothly. Before you even reach the trail, there’s a short stop in Ollantaytambo—there’s an option for breakfast there—so you’re not starting the hike on empty.
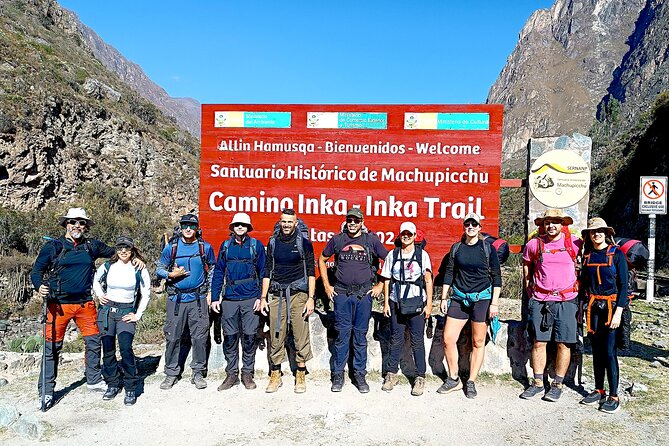
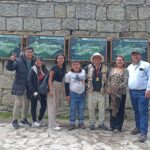
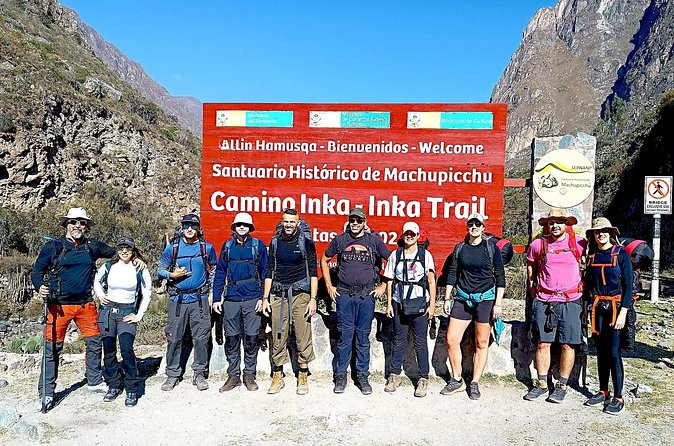
The real “start line” is Km 82, where you meet the group and present your documents for control and registration. It’s not glamorous, but it’s important. I like that the process is built into the itinerary, so you don’t feel like you’re guessing what to do or when to be ready. If you’ve ever dealt with travel checkpoints and last-minute confusion, you’ll understand why this matters on the Inca Trail.
Also note how the altitude is introduced early: after crossing the Urubamba River (around 2,200m), you begin the legendary trail. Your body feels every meter up, so having a slow first day is a smart design choice.
You can also read our reviews of more tours and experiences in Sacred Valley.
Ollantaytambo stop and your first taste of the Sacred Valley
The quick Ollantaytambo pause has one clear value: it’s a buffer. You’re already on Peruvian time, and having that small reset helps you settle before the main hike. Even if you skip breakfast, you still get a chance to reorganize basics—water, layers, hats, and those tiny things you swear you packed.
Then you’re back on track toward Km 82. This sequence matters because the Inca Trail isn’t just a hike. It’s a timed, controlled route with entry and document checks, and that’s where good planning shows up.
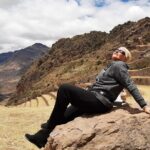
If you’re traveling with a camera, this first stretch is also where you’ll start to feel the day turning into the kind of journey you came for. You’re not yet at the hardest passes, but you’ll already spot how the trail threads through Inca-era terrain and river valleys.
Day 1 to Wayllabamba: Llactapata context and a manageable first climb
Day 1 is described as easier to follow, and that’s exactly what you want on a trail with real altitude ahead. After crossing the Urubamba River, you begin the walk with gentle navigation and a steady rhythm rather than a brutal start.
You’ll stop for lunch in Miskay, at a small riverbank. This is more than a break. The guide uses the stop to explain the archaeological complex of Llactapata, which makes you more attentive for what you’ll notice later—ruins that feel like they belong to the mountains instead of sitting on them.
From there, you hike to Wayllabamba (about 3,100m), which is your campsite for the night. You’re still within a range where many people can manage the day without feeling completely wrecked, but you are higher than you started. That mix—effort plus a night in camp—sets you up for Day 2 without turning the trek into a total endurance test from the first hour.
Practical note
7 hours on Day 1 is enough walking to build momentum, but it’s also a good day to find your pace. If you rush here, you’ll pay for it later at higher elevations.
Day 2 to Chaquicocha: Warmihuañusca (Death Pass) is the headline

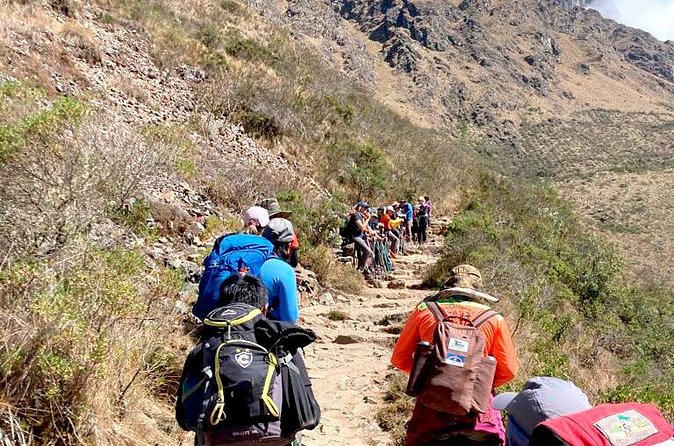
Day 2 is the one with real bite. The walking time is listed at around 9 hours, and it specifically mentions cold weather. That cold matters more than you might expect. When you’re climbing to higher passes, body heat depends on steady effort and smart layering.
The day begins by leading you toward the valley of Llulluchapampa at about 3,850m, with a stretch of around 3 km where you can experience rainforest sounds and water nearby. This is a nice contrast after Day 1: the environment shifts, and it keeps the trek from feeling like one long uniform grind.
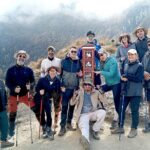
Then you’re heading toward the highest point of the day’s section. The climb to Warmihuañusca (Death Pass) reaches about 4,200m. This is known as the toughest part, and the best advice is to treat it like a controlled ascent, not a race to the top. After a brief stop at the summit, you continue with a long and steep slope toward the Pacaymayu River, passing through the Runkurakay pass (around 3,050m), and finally reach camp at Chaquicocha (about 3,650m).
Chaquicocha is the reward at the end of a hard day. After the physical effort, you can relax with an incredible view over the mountains. That’s the Inca Trail payoff: you earn the scenery.
How the tour handles pacing
The itinerary frames Day 2 as more of a steady workday than a strict line-walk. The plan is described as a “leisurely pace” on Day 2, with short stops during the walk. In practice, this helps you keep moving without constantly stopping—perfect for altitude management and for conserving energy.
Day 3: Wiñayhuayna rainforest, tunnels, and Phuyupatamarca above the clouds

Day 3 is often the favorite day because it feels like a shift from raw effort to more visual wonder. You’re walking through the rainforest of Wiñayhuayna, and the plan explicitly notes a change in ecosystem, with two small lakes at the top of the second pass (around 3,950m).
You’ll also encounter a gentle ascent through a small Inca tunnel. Even if tunnels aren’t your thing, it’s a memorable interruption in the hike—one of those moments where you realize you’re not just walking along trails; you’re moving through engineered Inca infrastructure.
From the pass, you get a view over the Urubamba River in the Sacred Valley. Then it’s on to the campsite called Phuyupatamarca (around 3,600m), a place whose name means city above the clouds. The plan highlights that it’s well-preserved and includes a long chain of Inca baths. That’s the kind of detail that makes the day feel “about more than the pass,” because you’re seeing how the Incas used the landscape for daily function, not just ceremonies.
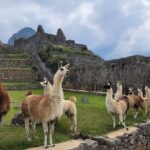
You pass through another Inca tunnel before visiting the Wiñayhuayna complex, called Forever young. Then you descend the valley and get your first broad views of the Machu Picchu mountain, which is a psychological boost: your body is tired, but your mind is locked on what’s coming next.
Why this day matters
Day 3 is the bridge between “the hike” and “the destination.” If you’ve been waiting for the moment the whole trip feels real, this is where it starts happening.
Day 4: Inti Punku sunrise view and a guided Machu Picchu visit
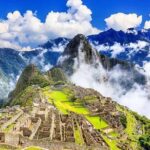
Day 4 starts with breakfast, then you begin the hike to Inti Punku (La Puerta del Sol, or the Gate of the Sun). The goal is a first view of Machu Picchu and—when conditions cooperate—seeing sunrise over it.
From there, the schedule includes a final triumphant slope that takes almost an hour before the plan for the Machu Picchu citadel visit (around 8:00 am). The timing is built around you arriving with enough energy to enjoy the place, not just sprint through it.
Once you’re at Machu Picchu (about 2,400m), you get a guided tour of approximately two hours. This is the part that can make or break your experience. A good guide helps you connect the site’s layout to meaning and purpose instead of treating it like a collection of stone structures.
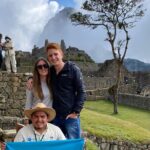
Then you have free time to explore on your own. The itinerary specifically mentions options like walking to the Inca Bridge, checking out the variety of Inca monuments, and even climbing Huayna Picchu for panoramic views. After that, you’ll descend to Aguas Calientes for lunch, and then return by train to Ollantaytambo and Cusco.
One logistics reality check
You’re moving between trail timing, sunrise timing, and scheduled transport. There can be moments where you feel rushed when getting from Machu Picchu down toward the rest of the day. It’s not the tour being sloppy; it’s the site and train schedule doing what they do. If you hate being on the clock, try to keep your expectations flexible on Day 4.
Price and value: what $905 covers (and what you must bring)
At $905 per person, you’re paying for a full package, not just the right to walk. Here’s what’s included according to the tour details:
- Entrance to the Inca Trail and Machu Picchu
- Tourist transport between Cusco and Km 82, plus from Ollantaytambo back to Cusco
- Transfers from Machu Picchu Village to the archaeological site (via a bus service noted as Consettur)
- A professional guide in Portuguese or Spanish (language on request)
- Camping equipment: tents, mats, bathroom setup, dining area tables/chairs
- A cook and meal support: breakfast on Day 3, 3 lunches and 3 dinners, plus 3 snacks across the hike
- Camping support and food carriers
- Return train from Machu Picchu Pueblo to Ollantaytambo (depending on availability)
- Oxygen and first aid on the trip
What’s not included:
- A sleeping bag
- Breakfast on the first day
- Lunches at Machu Picchu or in Aguas Calientes
- Extra carrier (if you need one beyond what’s covered)
So the value question boils down to this: you’re getting guided trail interpretation, camps with full setup, meals, and the Machu Picchu connection. If you were to self-organize guides, permits, camping gear, and porters, the math usually gets messy fast. This package keeps those pieces together.
Also, one important decision factor: the experience is non-refundable and can’t be changed. If you’re even slightly unsure about your fitness, health, or trip dates, make that call early.
Guides, food, and the human side of the trek
One of the most praised parts of this experience is the people running it. The name Franklin comes up as a standout guide who stayed attentive and flexible—keeping the group together while still accommodating those small detours to look at ruins or linger for photos.
Another name that appears is Giuliana, described as having great energy and constant readiness. I like that this isn’t just about facts and dates. On the Inca Trail, you need a guide who can explain what you’re seeing and also manage the group so nobody gets lost or left behind.
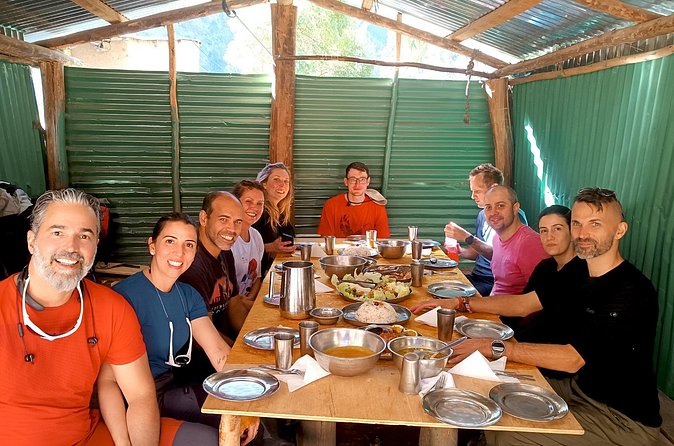
Then there’s the food. The plan includes breakfast on Day 3 and meals across all hiking days, and real experiences highlight that the food quality is much better than what many hikers expect on a multi-day trek. One account even mentions a cake baked one night, plus a daily tea time around 30 minutes before dinner. That kind of routine matters when your body is tired: it’s comfort you can count on.
And don’t underestimate the porters and support team. The whole reason you can hike without carrying tents, cooking equipment, and bulky gear is because that support exists. It also means you can focus on the trail instead of logistics.
Camp setup: comfortable enough, but don’t fake preparedness
Camping infrastructure is included: tents, mats, dining area setup, and even bathroom arrangements. That’s a big deal for most people. It turns a “backpacker fantasy” into a real, manageable plan.
Still, you need to bring a sleeping bag. The itinerary mentions cold weather on Day 2, and you’ll be sleeping at elevations around 3,100m to 3,650m on different nights. If you show up underprepared, the equipment can’t fix that. Plan for real cold nights.
Also, pack like a person who will hike. You won’t want heavy, bulky items that slow you down. The tour’s system uses carriers for much of the heavy lifting, but your personal essentials are still your job: layers, rain protection if you have it, and a plan for water.
Who this Inca Trail fits best
This tour clearly targets people with a strong physical level. That’s not a polite suggestion. The itinerary includes long days (around 7 to 9 hours), steep climbs, and altitude passes including Warmihuañusca at 4,200m.
If you like hiking and you’re excited by the idea of learning as you go, this is a great fit. The guided focus at ruins and the structured route make the trek feel like a single coherent story from Sacred Valley to Machu Picchu.
If you’re the type who needs comfort above all else, remember this is still a mountain trek. Camps and meals help, but the main challenge is the walking itself and the air.
Tips to make your trip easier (based on how the days are set up)
- Bring warm layers for Day 2. The plan calls out cold weather during the long walking day.
- Protect your energy on the climb to Death Pass. It’s the day everyone remembers, but your success depends on steady pacing.
- Don’t sleep without a sleeping bag. Camping gear is included, but that doesn’t mean you’ll be warm.
- Keep your documents organized for the Km 82 registration moment. It’s built into the start so you can’t wing it.
- On Day 4, plan for being on schedule. Sunrise views and transport connections mean you’ll want to move when it’s time to move.
- If you want Huayna Picchu views, be ready for it during your free time after the guided visit. Follow site rules when you’re there.
Should you book this Inca Trail to Machu Picchu?
I think you should book if you want a guided, organized trek with camp support and strong food, and you’re confident you can handle a multi-day hike at altitude. The small group size (up to 10) is a real advantage, and the guide-plus-camp setup makes the trip feel less stressful than going fully independent.
I’d think twice if any part of you is unsure about physical readiness. Death Pass is the headline, Day 2 is long and cold, and you’ll feel altitude at multiple points. Also, because the booking is non-refundable, only lock it in once your travel dates and health status are solid.
If you want your Machu Picchu morning to feel earned—Inti Punku first view, then a guided walk that helps you read the site—this is a strong match. And if you’re choosing between “just hiking” and “understanding what you’re seeing,” this one leans toward meaning, not just footsteps.
FAQ
How long is the Inca Trail portion on this 4-day tour?
The itinerary runs about 4 days total. The hiking days are listed as roughly 7 hours on Day 1, about 9 hours on Day 2, and about 6 hours on Day 3, with Day 4 focused on the Inti Punku hike and the Machu Picchu visit.
Where does the tour start?
The tour starts in Cusco with pick-up at around 5:30 am, then travels to Km 82 to begin the Inca Trail, after a brief stop in Ollantaytambo.
What’s the highest point on the trek?
Warmihuañusca (Death Pass) is the highest point listed, at about 4,200m. The itinerary also includes a second pass at about 3,950m.
What’s included for camping?
Camping equipment is included, including tents, mats, bathroom setup, and a dining setup with tables and chairs, plus the camping team and support.
Do I need a sleeping bag?
Yes. A sleeping bag is not included, so you should bring your own.
What meals are included?
The plan includes breakfast on Day 3, 3 lunches, 3 dinners, and 3 snacks. Breakfast on the first day is not included.
Is Machu Picchu entrance included?
Yes. Entrance to Machu Picchu is included, and you also get transport by bus from Machu Picchu Villa to the archaeological site.
What language is the guide?
The guide is professional and can work in Portuguese or Spanish based on your request.
How does the trip get back to Cusco?
After Machu Picchu, the plan includes descent to Aguas Calientes for lunch, then return by train from Machu Picchu Pueblo to Estación Ollantaytambo and onward to Cusco via tourist transport, depending on train availability.